Programming Projects for Advanced Beginners #1: ASCII art
12 Jun 2018
This is a programming project for Advanced Beginners. If you’ve completed all the introductory tutorials and short exercises you can find, but are struggling to find medium-sized projects to develop your skills on, this project is for you. It is structured and guided, whilst still leaving all of the difficult work to you. You can do it in whichever programming language you happen to be learning, and if you get stuck I’ll help you out over email, Twitter or Skype.
NEW
Subscribe to my new "Programming Feedback for Advanced Beginners"
newsletter to receive concise weekly emails containing specific,
real-world ways to make your code cleaner and more professional.
Each week I review code sent to me by one of my readers. I highlight
the things that I like, discuss the
things that I think could be better, and offer suggestions for how
the author could make their code cleaner and easier to work with.
Subscribe now to receive these invaluable improvements in your inbox
every week, completely free.
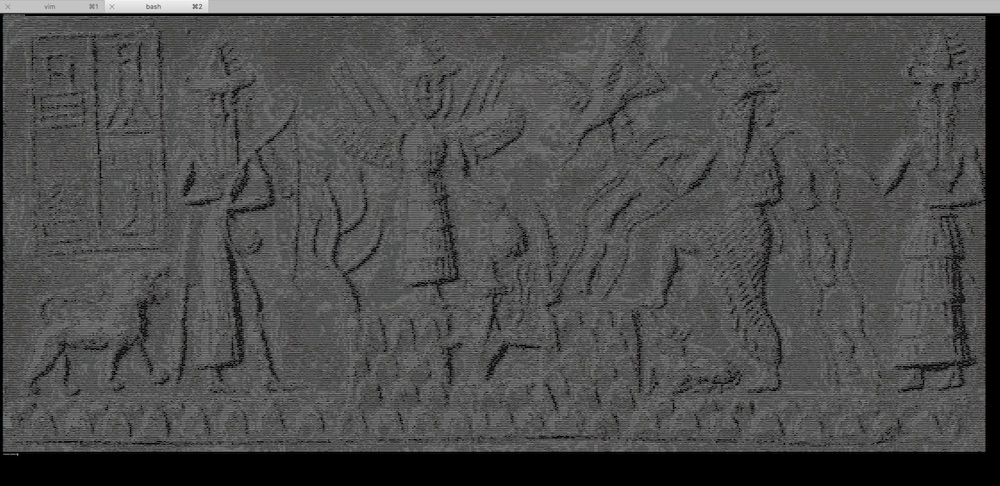
You’re going to write a program to turn images into ASCII-art. ASCII is a primitive but beautiful art form first developed by the Sumerians in 4000BCE. It is created by printing characters to your terminal so as to recreate the contours of a source image. The best modern ASCII-art can expect to fetch as many as 10,000 retweets at auction.
The initial project is broken up into 5 sections. You won’t actually generate an ASCII picture until the end of step 5 (it will be worth the wait, I promise), so at the end of each section there’s a block of intermediate output that you should print and verify. Make sure that it looks “sensible” before going onto the next section - bite-size verification of small parts of your code is very important for making sure that you’re on the right track.
Once you finish, there are several extension projects. In these you will build on top of your ASCII-art generator to add glorious technicolor to your pictures, make a Facebook-style flag-overlay, and even build an ASCII-webcam to replace Apple’s Photobooth.
If you get stuck (defined as making zero progress for 30 minutes), you can get some inspiration from my example project. I’ve written it in Python, but I’ve also tried to avoid using any Python-specific constructs. It should therefore be a useful reference regardless of which language you are using. If your code looks different from mine, don’t worry! There are many ways to structure this project. If the project guide contain any terms that you haven’t seen before then apologies, that’s my fault. Just ask Google to explain.
If you get completely stuck (defined as making zero progress for 60 minutes), take a break and come back later with a clear mind. If you would like to, send me an email or a Tweet and I’ll do my level best to try and help you over the bump.
0. Choose an image
A JPEG image is a grid of pixels. If you zoom in enough then you can see them.
In your ASCII art, you’re going to represent each of these pixels using an ASCII character. Assuming you’re using white text on a dark terminal background, dark pixels will be represented by small characters like a dot (.), which leave lots of dark terminal background exposed. Bright pixels will be represented by dense characters like $, which instead fill up the screen with white text.
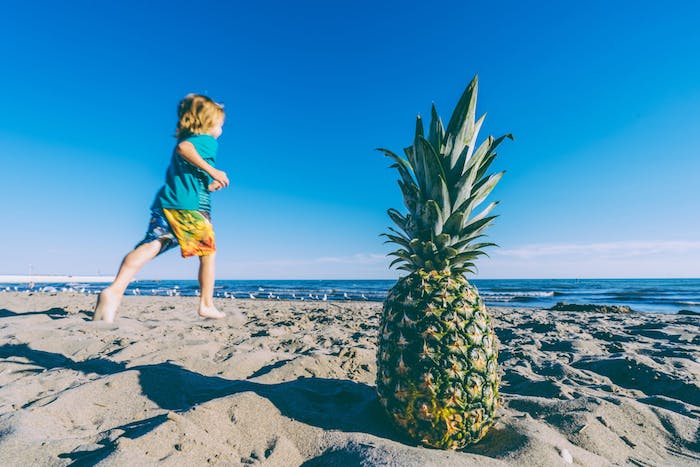
Choose the first image that you want to convert into ASCII art. For reasons that will become apparent, it’s good to start with an image around 640x480 pixels in size. Here’s a picture of a pineapple hanging out on a beach that you might like to use.
1. Read your image and print its height and width in pixels
First, find and install an image processing library. Which library you choose will depend on your language, but now that we are in the year 2018, most libraries should have good installation instructions. If they don’t and you have trouble then it’s not your fault - just move on and try another library.
- For Python I’ve used Pillow and found it very pleasant
- For Ruby, MiniMagick looks good
- For Javascript, try CamanJS
- For other languages, have a look for an ImageMagick wrapper, or just have a Google and see what most other people use
Once you’ve found and installed a library, start by using it to simply read your image file. It will only take 1 or 2 lines of code to load your image and print its height and width, but doing so will ensure you’ve got the library installed correctly, and help you get familiar with its documentation.
At the end of this section, your program should print output that looks something like:
Successfully loaded image!
Image size: 640 x 480
2. Load your image’s pixel data into a 2-dimensional array
In image processing libraries a pixel in a JPEG image is represented by a tuple, a data structure conceptually very similar to a list or array. Each tuple contains 3 numbers between 0 and 255 that describe the amount of Red, Green and Blue in a pixel (for example (76, 54, 121)). Red, green and blue are the primary colors of light, and in the right proportions can be combined to create every single other color in existence.
The next step after loading your image is therefore to read all the tuples representing all of your image’s pixels, and store them in a 2-dimensionsional array (an arrary where each element is itself an array, also known as a matrix). There are many other data structures you could store them in if you wanted. But a 2-dimensional array is particularly suitable for working with grid data like your matrix of pixels.
# A 2-dimensional array of pixels:
[
  [(255,45,19), (44,44,92), (80,1,9), ...],
  [(51,2,231), (61,149,14), (234,235,211), ...],
  [(51,2,231), (61,149,14), (199,102,202)...],
  [(51,2,231), (61,149,14), (1,5,42)...],
  ...
]
With your pixel data in a 2-dimensional array, you will be able to access the data at a given x, y co-ordinate as pixel_matrix[x][y], and you will be able to iterate through it using something like:
for x in len(pixel_matrix):
    for y in len(pixel_matrix[x]):
        pixel = pixel_matrix[x][y]
        # Now do something with the pixel...
Some image processing libraries may already have a ready-made method that loads your image’s pixels into a 2-dimensional array for you. If your library has a method like this, use it! If not, piece together the methods it does have, and remember that Google knows a lot about topics like “python pillow 2-d pixel array”.
At the end of this section, your program should print extra output that looks something like:
Successfully constructed pixel matrix!
Pixel matrix size: 640 x 480
Iterating through pixel contents:
(255, 255, 255)
(10, 64, 172)
# … and so on for many thousands of lines.
# Delete or comment this debugging code out once you've established that it works
3. Convert the RGB tuples of your pixels into single brightness numbers
You’ve now loaded a matrix of pixel data, where each pixel is represented as an RGB tuple. However, for this project you don’t care about colors and the individual RGB values - you’re only interested in the overall brightness of each pixel. You therefore need to convert your “RGB matrix” into a “brightness matrix”. The brightness matrix will be the same shape and size as the RGB matrix, but each element will be a single value between 0 and 255 that represents the overall brightness of the pixel, instead of a tuple with 3 values for each of red, blue and green.
There are many different ways to map RGB values to brightness, and each produces a slightly different style of transformed image. Think of them like Instagram filters. Some examples:
- Average: average the R, G and B values -
(R + G + B) / 3
- Lightness: average the maximum and minimum values out of R, G and B -
max(R, G, B) + min(R, G, B) / 2
- Luminosity: take a weighted average of the R, G and B values to account for human perception -
0.21 R + 0.72 G + 0.07 B
(lots more detail here)
For now, start with the Average. Later on you can try the other mappings and see which one looks best.
At the end of this section, your program should print extra output that looks something like:
Successfully constructed brightness matrix!
Brightness matrix size: 640 x 480
Iterating through pixel brightnesses:
68
12
# etc...
4. Convert brightness numbers to ASCII characters
You’ve constructed a matrix of brightnesses for each pixel. Now you can convert this brightness matrix to an ASCII character matrix. Each element of the brightness matrix is a single number representing a brightness; each corresponding element of the ASCII character matrix is a single ASCII character that will represent this brightness when printed to the terminal. You can experiment with different ways to map brightnesses to characters, but a good place to start is the string below. The characters in it are ordered from thinnest to boldest, which means darkest to lightest for white text on a dark terminal background.
"`^\",:;Il!i~+_-?][}{1)(|\\/tfjrxnuvczXYUJCLQ0OZmwqpdbkhao*#MW&8%B@$"
For each number in your brightness matrix, map it to the appropriate character on the above scale and store it in the ASCII matrix. A brightness of 0 should map to a delicate backtick (`), and a brightness of 255 should map to big stocky dollar sign ($).
Mapping brightnesses in between 0 and 255 to the correct character will require a dash of maths. It may help your thinking to pretend that the numbers involved are a bit rounder. Imagine that the brightnesses are on a scale from 0 to 100, and that you are displaying these brightnesses using 20 characters. A brightness of 50 would map to character 10. A brightness of 60 would map to character number 12. What character number should a brightness of 30 map to? What about 75? What about 20? What’s the formula you’re using to work these out? Write it down in a comment, don’t worry about converting it to code yet.
What if you make the brightnesses weird, non-divisible numbers? You can’t map a brightness onto character number 9.8. So what’s the best character number for a brightness of 49 map to? What about 52? What about 87? What’s the logic you’re using to work these out? Write it down in a comment as well. How could you express the entire formula in code? Will it still work when you’re working with a brightness scale of 0 to 255 and 70 characters? (hint - yes)
At the end of this section, your program should print extra output that looks something like:
Successfully constructed ASCII matrix!
ASCII matrix size: 640 x 480
Iterating through pixel ASCII characters:
Q
#
}
# etc...
5. Print your ASCII art!
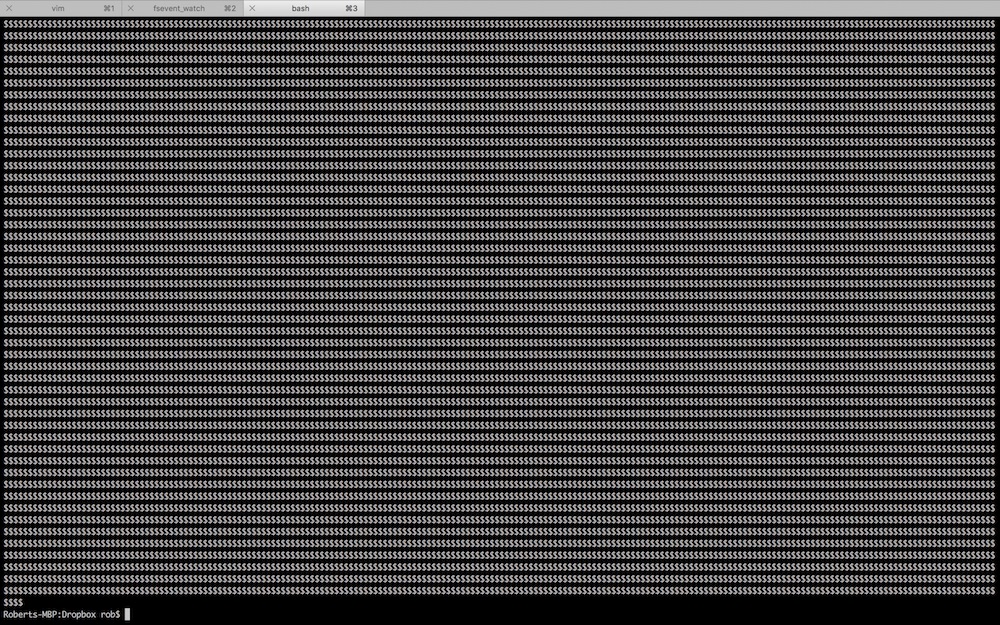
Now that you’ve done all the difficult work to build an ASCII matrix, print the contents to your terminal and admire it! You may have to fix some bugs first - here’s what happened when I first attempted to print a picture:
Even once you’ve fixed the obvious bugs (congratulations!), you may still have some issues to address.
Problem 1 - your image looks squashed
You’re displaying each pixel in your image using a character in your terminal. And whilst pixels are square, your terminal characters are rectangles, roughly three times as tall as they are wide. This will make your image appear squashed and narrow. The simplest way to fix this is to print each character in each row of your ASCII matrix three times, to stretch the image back out. For example, the list ['$', 'A', '#'] would be printed out as $$$AAA###.
Problem 2 - your ASCII matrix is too large for your screen
A normal photograph is thousands of pixels in height and width. You have nowhere near enough space in your terminal to represent each pixel with its own character. You can zoom out on your terminal using Cmd+- or Ctrl+-, but for large images your lines will still run over.
The solution is to add some code to shrink your image before you build your initial pixel matrix. All sensible image processing libraries should have a way to resize an image before converting it to pixels - have a look in your library’s documentation. Use trial and error to work out the largest image that you can display on your terminal.
After pausing to pat yourself on the back, send me an email with what you found easy, what you found confusing, whether you got stuck anywhere, and what you’d like more explanation of in the future. If there’s anything you’d find helpful to go over in person over Skype, please let me know. I’m going to be making more advanced-beginner projecs like this, and I’d like to understand how to make them as useful as possible. After sending that email (seriously, send it) and signing up for my mailing list at the bottom of this page (do that too), compose yourself and venture boldly into the extensions section.
NEW
Subscribe to my new "Programming Feedback for Advanced Beginners"
newsletter to receive concise weekly emails containing specific,
real-world ways to make your code cleaner and more professional.
Each week I review code sent to me by one of my readers. I highlight
the things that I like, discuss the
things that I think could be better, and offer suggestions for how
the author could make their code cleaner and easier to work with.
Subscribe now to receive these invaluable improvements in your inbox
every week, completely free.
Extensions
In rough order of difficulty, with the easiest first:
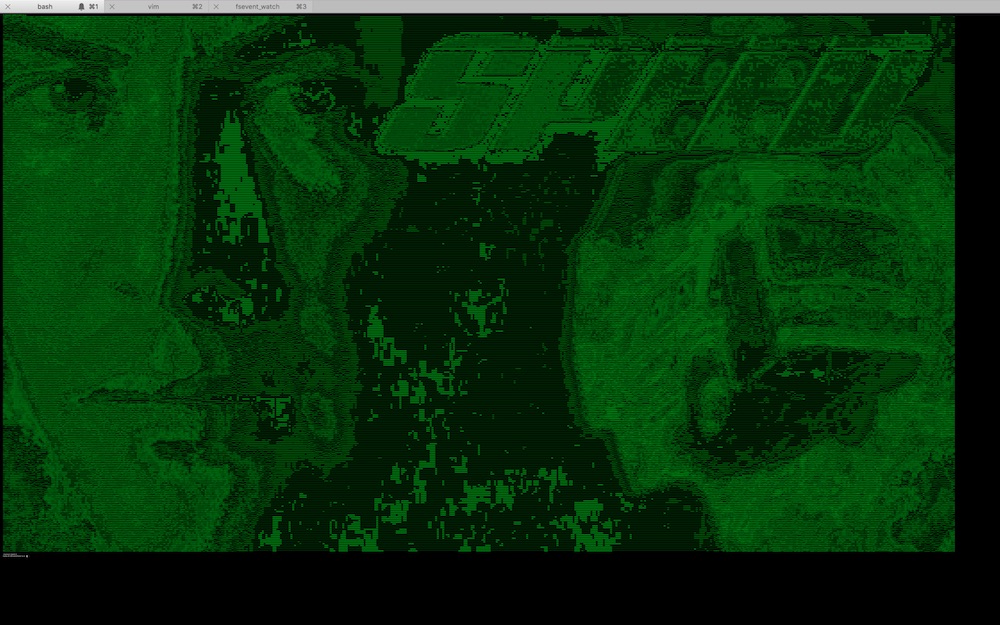
1. Print your ASCII-art in badass Matrix Green
Research how to change the color of the text that prints to your terminal. There will almost certainly be a library for your language that helps with the fiddly bits, for example colorama for Python.
2. Implement the min/max and luminosity brightness mappings from section 3
Add a setting to your program that can be set to either “average”, “min_max” ((max(R, G, B) + min(R, G, B)) / 2 - see section 3) or “luminosity” (0.21 R + 0.72 G + 0.07 B), and use if-statements to select the appropriate brightness mapping depending on what it is set to.
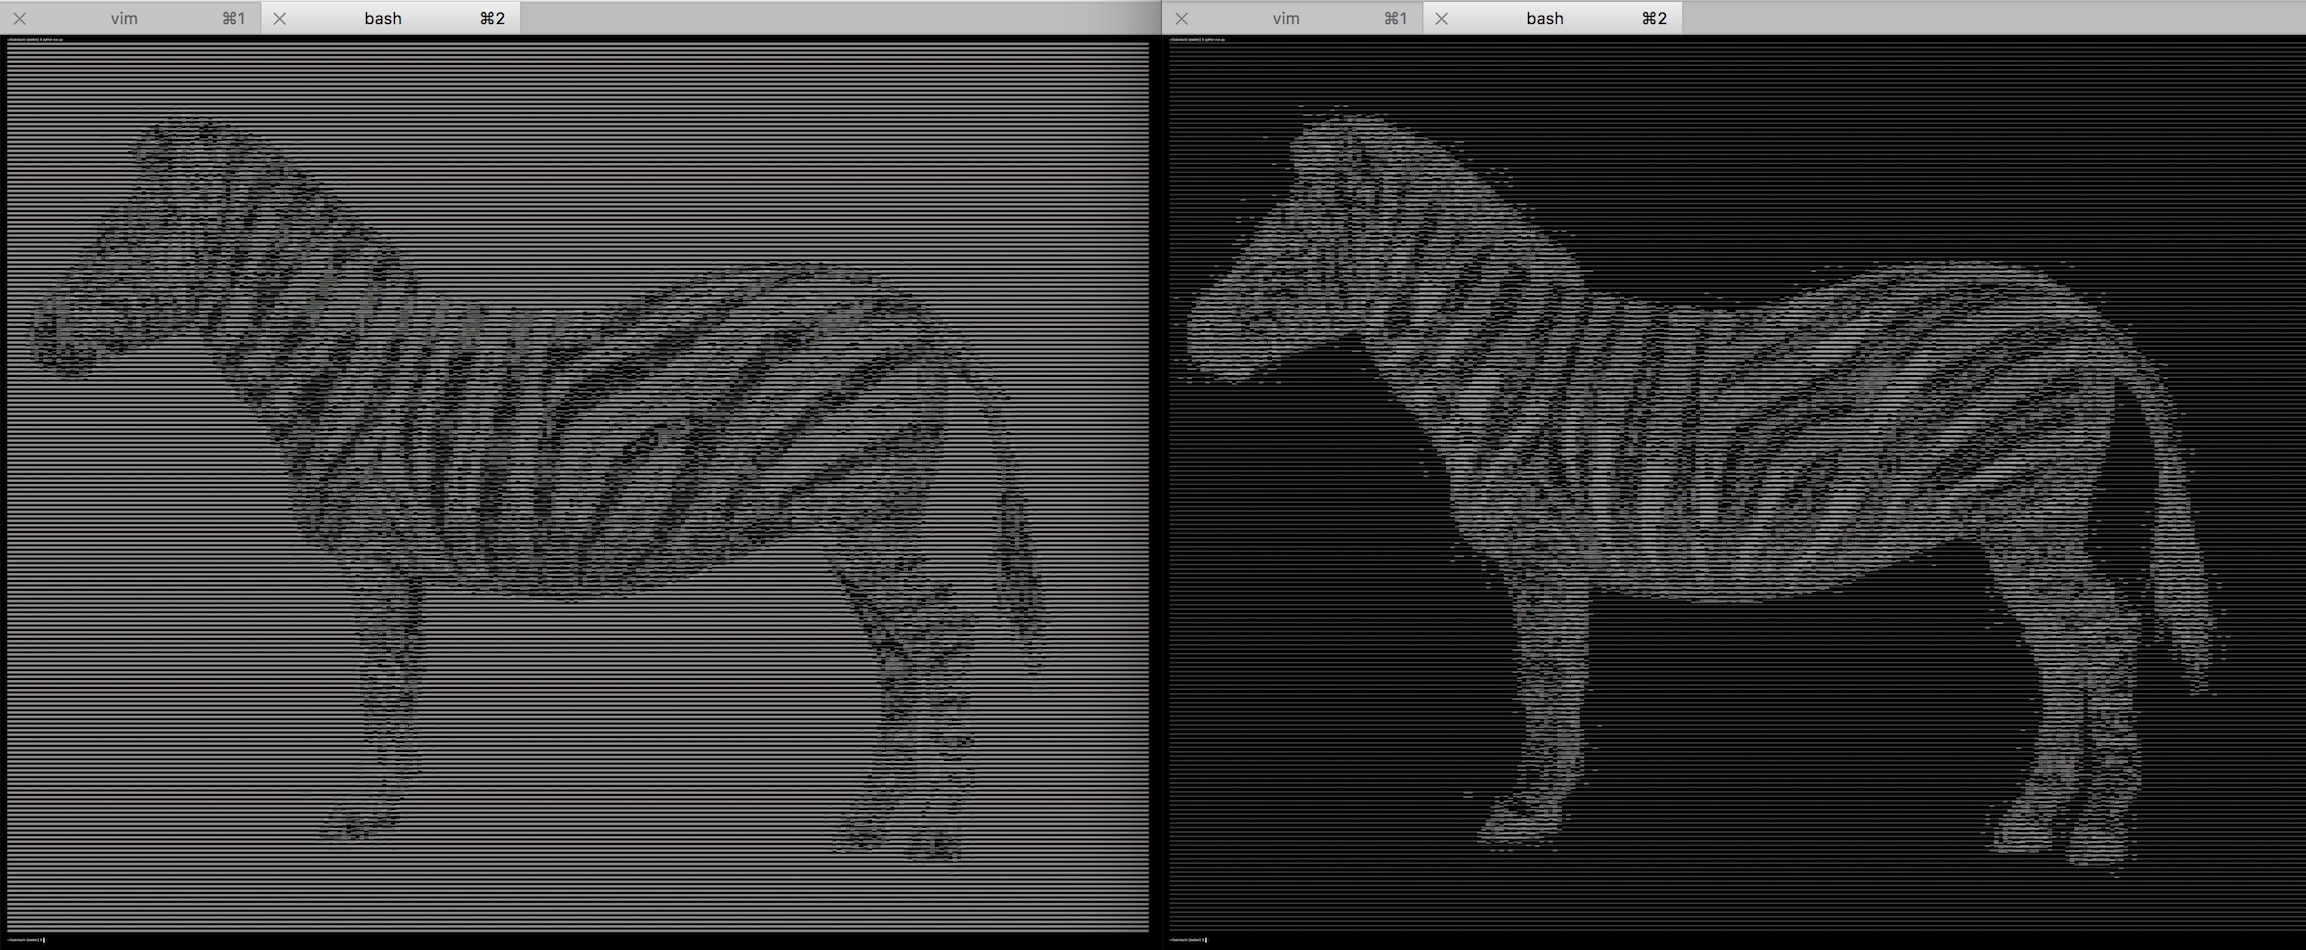
3. Add the option to invert all the brightnesses, so dark becomes light and light becomes dark
Requires some thought and a tiny bit of maths. Here are how some pixel brightnesses will be changed by an inversion:
- 0 => 255
- 255 => 0
- 200 => 55
- 55 => 200
- 120 => 135
What is the general rule? How can you implement this in code?
Try and structure your code so that it’s easy to turn brightness inversion on and off.
4. Print pictures from your webcam
If you’re using OSX, look into a command-line tool called Imagesnap. You can install Imagesnap by first installing Homebrew, and then running brew install imagesnap. Look at the documentation and try running the imagesnap command manually from your terminal.
Then do some research into how to run command-line tools from your code. All languages should have a way of doing this - Python has subprocess, Ruby has Popen.
Finally, wire the pieces together. Update your code to run imagesnap to save an image to a specific location, then run this location through your ASCII-art generator.
5. Print your ASCII art in glorious color
If you’ve got this far then you probably don’t need any pointers, although you’re going to get some anyway. Printing your image in color will require you to refactor a lot of your existing code, since up until now you’ve been throwing away color information when you convert your pixel matrix into an intensity matrix.
You don’t have to print the entire image in color. You could add some subtle artsy accents on pixels that are almost entirely Red, Blue or Green (for example pixels with the values (240, 3, 10), (13, 226, 18) or (0, 0, 255)) and print the rest in black and white. Or choose pixels colors based on a flag overlay, whilst keeping the brightnesses of the underlying image. The only limits are your imagination and the very real constraints of attempting to paint using a computer terminal that was only ever designed to handle data input and output.
This is a programming project for Advanced Beginners. If you’ve completed all the introductory tutorials and short exercises you can find, but are struggling to find medium-sized projects to develop your skills on, this project is for you. It is structured and guided, whilst still leaving all of the difficult work to you. You can do it in whichever programming language you happen to be learning, and if you get stuck I’ll help you out over email, Twitter or Skype.
Subscribe to my new "Programming Feedback for Advanced Beginners" newsletter to receive concise weekly emails containing specific, real-world ways to make your code cleaner and more professional.
Each week I review code sent to me by one of my readers. I highlight the things that I like, discuss the things that I think could be better, and offer suggestions for how the author could make their code cleaner and easier to work with.
Subscribe now to receive these invaluable improvements in your inbox every week, completely free.
You’re going to write a program to turn images into ASCII-art. ASCII is a primitive but beautiful art form first developed by the Sumerians in 4000BCE. It is created by printing characters to your terminal so as to recreate the contours of a source image. The best modern ASCII-art can expect to fetch as many as 10,000 retweets at auction.
The initial project is broken up into 5 sections. You won’t actually generate an ASCII picture until the end of step 5 (it will be worth the wait, I promise), so at the end of each section there’s a block of intermediate output that you should print and verify. Make sure that it looks “sensible” before going onto the next section - bite-size verification of small parts of your code is very important for making sure that you’re on the right track.
Once you finish, there are several extension projects. In these you will build on top of your ASCII-art generator to add glorious technicolor to your pictures, make a Facebook-style flag-overlay, and even build an ASCII-webcam to replace Apple’s Photobooth.
If you get stuck (defined as making zero progress for 30 minutes), you can get some inspiration from my example project. I’ve written it in Python, but I’ve also tried to avoid using any Python-specific constructs. It should therefore be a useful reference regardless of which language you are using. If your code looks different from mine, don’t worry! There are many ways to structure this project. If the project guide contain any terms that you haven’t seen before then apologies, that’s my fault. Just ask Google to explain.
If you get completely stuck (defined as making zero progress for 60 minutes), take a break and come back later with a clear mind. If you would like to, send me an email or a Tweet and I’ll do my level best to try and help you over the bump.
0. Choose an image
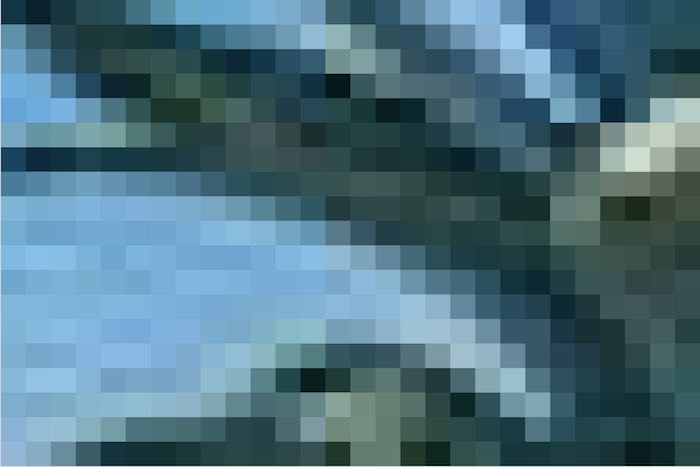
A JPEG image is a grid of pixels. If you zoom in enough then you can see them.
![]()
In your ASCII art, you’re going to represent each of these pixels using an ASCII character. Assuming you’re using white text on a dark terminal background, dark pixels will be represented by small characters like a dot (.), which leave lots of dark terminal background exposed. Bright pixels will be represented by dense characters like $, which instead fill up the screen with white text.
Choose the first image that you want to convert into ASCII art. For reasons that will become apparent, it’s good to start with an image around 640x480 pixels in size. Here’s a picture of a pineapple hanging out on a beach that you might like to use.
1. Read your image and print its height and width in pixels
First, find and install an image processing library. Which library you choose will depend on your language, but now that we are in the year 2018, most libraries should have good installation instructions. If they don’t and you have trouble then it’s not your fault - just move on and try another library.
- For Python I’ve used Pillow and found it very pleasant
- For Ruby, MiniMagick looks good
- For Javascript, try CamanJS
- For other languages, have a look for an ImageMagick wrapper, or just have a Google and see what most other people use
Once you’ve found and installed a library, start by using it to simply read your image file. It will only take 1 or 2 lines of code to load your image and print its height and width, but doing so will ensure you’ve got the library installed correctly, and help you get familiar with its documentation.
At the end of this section, your program should print output that looks something like:
Successfully loaded image!
Image size: 640 x 480
2. Load your image’s pixel data into a 2-dimensional array
In image processing libraries a pixel in a JPEG image is represented by a tuple, a data structure conceptually very similar to a list or array. Each tuple contains 3 numbers between 0 and 255 that describe the amount of Red, Green and Blue in a pixel (for example (76, 54, 121)). Red, green and blue are the primary colors of light, and in the right proportions can be combined to create every single other color in existence.
The next step after loading your image is therefore to read all the tuples representing all of your image’s pixels, and store them in a 2-dimensionsional array (an arrary where each element is itself an array, also known as a matrix). There are many other data structures you could store them in if you wanted. But a 2-dimensional array is particularly suitable for working with grid data like your matrix of pixels.
# A 2-dimensional array of pixels:
[
[(255,45,19), (44,44,92), (80,1,9), ...],
[(51,2,231), (61,149,14), (234,235,211), ...],
[(51,2,231), (61,149,14), (199,102,202)...],
[(51,2,231), (61,149,14), (1,5,42)...],
...
]
With your pixel data in a 2-dimensional array, you will be able to access the data at a given x, y co-ordinate as pixel_matrix[x][y], and you will be able to iterate through it using something like:
for x in len(pixel_matrix):
for y in len(pixel_matrix[x]):
pixel = pixel_matrix[x][y]
# Now do something with the pixel...
Some image processing libraries may already have a ready-made method that loads your image’s pixels into a 2-dimensional array for you. If your library has a method like this, use it! If not, piece together the methods it does have, and remember that Google knows a lot about topics like “python pillow 2-d pixel array”.
At the end of this section, your program should print extra output that looks something like:
Successfully constructed pixel matrix!
Pixel matrix size: 640 x 480
Iterating through pixel contents:
(255, 255, 255)
(10, 64, 172)
# … and so on for many thousands of lines.
# Delete or comment this debugging code out once you've established that it works
3. Convert the RGB tuples of your pixels into single brightness numbers
You’ve now loaded a matrix of pixel data, where each pixel is represented as an RGB tuple. However, for this project you don’t care about colors and the individual RGB values - you’re only interested in the overall brightness of each pixel. You therefore need to convert your “RGB matrix” into a “brightness matrix”. The brightness matrix will be the same shape and size as the RGB matrix, but each element will be a single value between 0 and 255 that represents the overall brightness of the pixel, instead of a tuple with 3 values for each of red, blue and green.
There are many different ways to map RGB values to brightness, and each produces a slightly different style of transformed image. Think of them like Instagram filters. Some examples:
- Average: average the R, G and B values -
(R + G + B) / 3 - Lightness: average the maximum and minimum values out of R, G and B -
max(R, G, B) + min(R, G, B) / 2 - Luminosity: take a weighted average of the R, G and B values to account for human perception -
0.21 R + 0.72 G + 0.07 B
(lots more detail here)
For now, start with the Average. Later on you can try the other mappings and see which one looks best.
At the end of this section, your program should print extra output that looks something like:
Successfully constructed brightness matrix!
Brightness matrix size: 640 x 480
Iterating through pixel brightnesses:
68
12
# etc...
4. Convert brightness numbers to ASCII characters
You’ve constructed a matrix of brightnesses for each pixel. Now you can convert this brightness matrix to an ASCII character matrix. Each element of the brightness matrix is a single number representing a brightness; each corresponding element of the ASCII character matrix is a single ASCII character that will represent this brightness when printed to the terminal. You can experiment with different ways to map brightnesses to characters, but a good place to start is the string below. The characters in it are ordered from thinnest to boldest, which means darkest to lightest for white text on a dark terminal background.
"`^\",:;Il!i~+_-?][}{1)(|\\/tfjrxnuvczXYUJCLQ0OZmwqpdbkhao*#MW&8%B@$"
For each number in your brightness matrix, map it to the appropriate character on the above scale and store it in the ASCII matrix. A brightness of 0 should map to a delicate backtick (`), and a brightness of 255 should map to big stocky dollar sign ($).
Mapping brightnesses in between 0 and 255 to the correct character will require a dash of maths. It may help your thinking to pretend that the numbers involved are a bit rounder. Imagine that the brightnesses are on a scale from 0 to 100, and that you are displaying these brightnesses using 20 characters. A brightness of 50 would map to character 10. A brightness of 60 would map to character number 12. What character number should a brightness of 30 map to? What about 75? What about 20? What’s the formula you’re using to work these out? Write it down in a comment, don’t worry about converting it to code yet.
What if you make the brightnesses weird, non-divisible numbers? You can’t map a brightness onto character number 9.8. So what’s the best character number for a brightness of 49 map to? What about 52? What about 87? What’s the logic you’re using to work these out? Write it down in a comment as well. How could you express the entire formula in code? Will it still work when you’re working with a brightness scale of 0 to 255 and 70 characters? (hint - yes)
At the end of this section, your program should print extra output that looks something like:
Successfully constructed ASCII matrix!
ASCII matrix size: 640 x 480
Iterating through pixel ASCII characters:
Q
#
}
# etc...
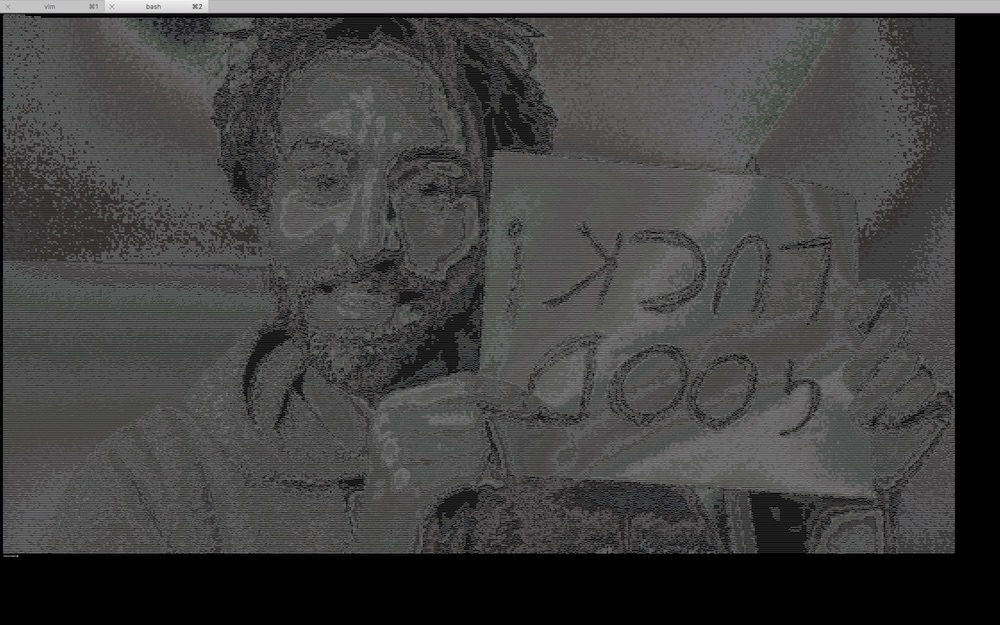
5. Print your ASCII art!
Now that you’ve done all the difficult work to build an ASCII matrix, print the contents to your terminal and admire it! You may have to fix some bugs first - here’s what happened when I first attempted to print a picture:
Even once you’ve fixed the obvious bugs (congratulations!), you may still have some issues to address.
Problem 1 - your image looks squashed
You’re displaying each pixel in your image using a character in your terminal. And whilst pixels are square, your terminal characters are rectangles, roughly three times as tall as they are wide. This will make your image appear squashed and narrow. The simplest way to fix this is to print each character in each row of your ASCII matrix three times, to stretch the image back out. For example, the list ['$', 'A', '#'] would be printed out as $$$AAA###.
Problem 2 - your ASCII matrix is too large for your screen
A normal photograph is thousands of pixels in height and width. You have nowhere near enough space in your terminal to represent each pixel with its own character. You can zoom out on your terminal using Cmd+- or Ctrl+-, but for large images your lines will still run over.
The solution is to add some code to shrink your image before you build your initial pixel matrix. All sensible image processing libraries should have a way to resize an image before converting it to pixels - have a look in your library’s documentation. Use trial and error to work out the largest image that you can display on your terminal.
After pausing to pat yourself on the back, send me an email with what you found easy, what you found confusing, whether you got stuck anywhere, and what you’d like more explanation of in the future. If there’s anything you’d find helpful to go over in person over Skype, please let me know. I’m going to be making more advanced-beginner projecs like this, and I’d like to understand how to make them as useful as possible. After sending that email (seriously, send it) and signing up for my mailing list at the bottom of this page (do that too), compose yourself and venture boldly into the extensions section.
Subscribe to my new "Programming Feedback for Advanced Beginners" newsletter to receive concise weekly emails containing specific, real-world ways to make your code cleaner and more professional.
Each week I review code sent to me by one of my readers. I highlight the things that I like, discuss the things that I think could be better, and offer suggestions for how the author could make their code cleaner and easier to work with.
Subscribe now to receive these invaluable improvements in your inbox every week, completely free.
Extensions
In rough order of difficulty, with the easiest first:
1. Print your ASCII-art in badass Matrix Green
Research how to change the color of the text that prints to your terminal. There will almost certainly be a library for your language that helps with the fiddly bits, for example colorama for Python.
2. Implement the min/max and luminosity brightness mappings from section 3
Add a setting to your program that can be set to either “average”, “min_max” ((max(R, G, B) + min(R, G, B)) / 2 - see section 3) or “luminosity” (0.21 R + 0.72 G + 0.07 B), and use if-statements to select the appropriate brightness mapping depending on what it is set to.
3. Add the option to invert all the brightnesses, so dark becomes light and light becomes dark
Requires some thought and a tiny bit of maths. Here are how some pixel brightnesses will be changed by an inversion:
- 0 => 255
- 255 => 0
- 200 => 55
- 55 => 200
- 120 => 135
What is the general rule? How can you implement this in code?
Try and structure your code so that it’s easy to turn brightness inversion on and off.
4. Print pictures from your webcam
If you’re using OSX, look into a command-line tool called Imagesnap. You can install Imagesnap by first installing Homebrew, and then running brew install imagesnap. Look at the documentation and try running the imagesnap command manually from your terminal.
Then do some research into how to run command-line tools from your code. All languages should have a way of doing this - Python has subprocess, Ruby has Popen.
Finally, wire the pieces together. Update your code to run imagesnap to save an image to a specific location, then run this location through your ASCII-art generator.
5. Print your ASCII art in glorious color
If you’ve got this far then you probably don’t need any pointers, although you’re going to get some anyway. Printing your image in color will require you to refactor a lot of your existing code, since up until now you’ve been throwing away color information when you convert your pixel matrix into an intensity matrix.
You don’t have to print the entire image in color. You could add some subtle artsy accents on pixels that are almost entirely Red, Blue or Green (for example pixels with the values (240, 3, 10), (13, 226, 18) or (0, 0, 255)) and print the rest in black and white. Or choose pixels colors based on a flag overlay, whilst keeping the brightnesses of the underlying image. The only limits are your imagination and the very real constraints of attempting to paint using a computer terminal that was only ever designed to handle data input and output.